The Switch is, without a doubt, one of Nintendo’s best gaming devices, boasting portability while still performing as well as you’d expect from a home console. While its versatility makes it suitable for a variety of different lifestyles and uses, its success as a portable handheld is dependent on the durability of its hardware.
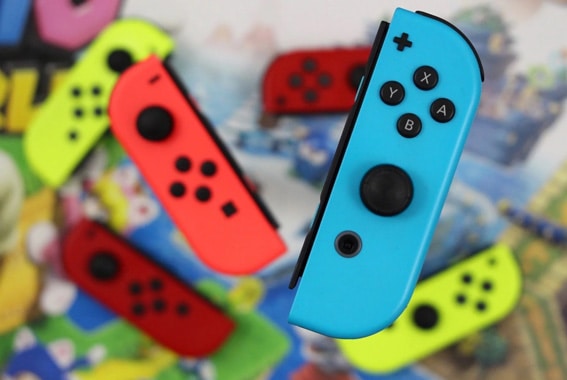
Although the Switch can definitely take a beating, it does have a few recurring issues that have plagued an increasing number of Switch owners. Chief among these is ‘Joy-Con drift,’ in which the joystick on either the left or right Joy-Con will register inputs even when not being pushed.
This can prove frustrating in games as characters will start moving on their own. Besides that, it can even make scrolling through menus a pain.
While the jury is still out as to what causes Joy-Con drift, there are two popular theories. The first one suggests that built-up debris within the joystick’s housing causes damage to the contacts inside, which makes sense considering the Switch is portable and, therefore, exposed to both outdoor and indoor contaminants.
The second theory comes directly from Switch owners who have disassembled their Joy-Con. They argue that the contacts inside the joystick housing are made with low-quality materials, causing them to decrease in quality over time, regardless of how often or where the Switch is used.
Whatever the cause is, this is an issue that a majority of Switch owners are going to want to fix at some point, so here we’ve listed a number of possible solutions along with step-by-step instructions.
Let’s get started!
Table of ContentsShow
Solution 1: Update Your Switch’s Firmware and Recalibrate Your Joy-Con
What you’ll need:
- Your Switch
- An internet connection
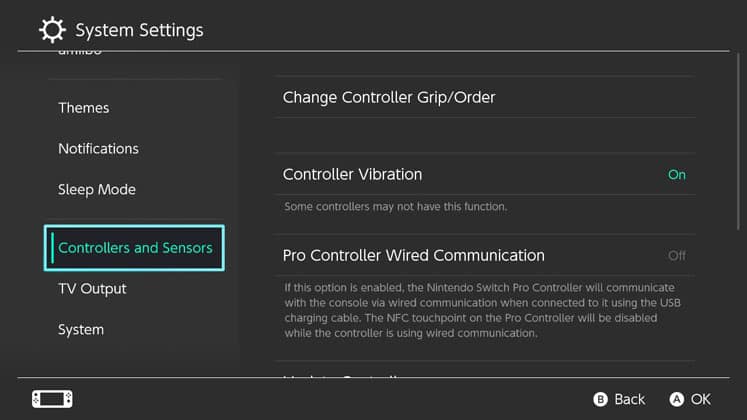
It can also possible you’re not experiencing Joy-Con drift and either you haven’t installed the latest firmware or your joysticks simply need to be recalibrated. To do both, head to your Switch’s System Settings from the main menu and scroll down the left-hand menu to ‘Controllers and Sensors’.
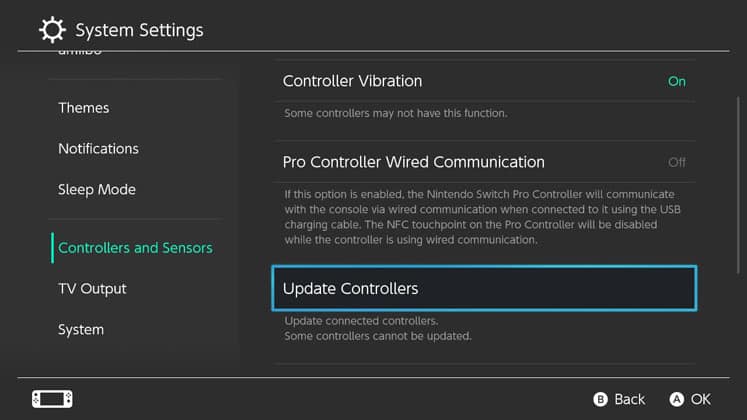
Once you’re there, scroll down the right-hand menu until you reach ‘Update Controllers’. Selecting this will download the latest firmware.
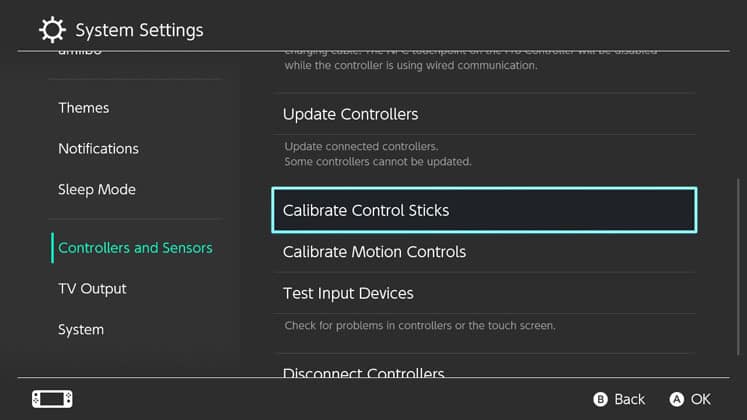
Next, you’ll want to select the option below labeled ‘Calibrate Control Sticks’. Follow the instructions that appear on screen, clicking the joystick you wish to calibrate. Feel free to do this for both the left and right Joy-Con. If you’re still experiencing issues with either controller, proceed to Solution 2.
Solution 2: Send Your Joy-Con to Nintendo for Repair
What you’ll need:
- Your Switch
- An internet connection
- A shipping box and some tape
If updating your controllers doesn’t help, the next best option is to simply send your Joy-Con in for repair.
Originally, Switch owners were asked to provide proof of purchase in order to receive a free repair; however, Nintendo has since revised their terms and are now offering to fix Joy-Con at no cost and without having to confirm your warranty status.
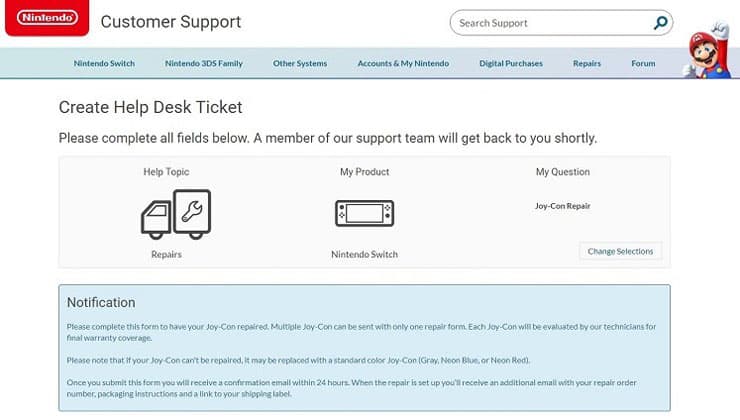
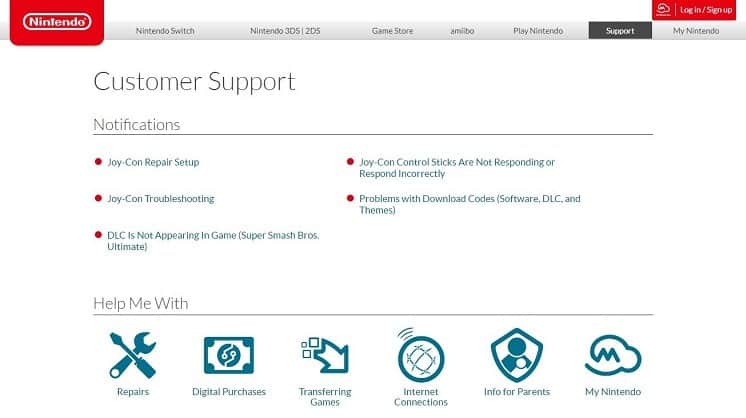
To set up a repair, head over to support.nintendo.com and select ‘Joy-Con Repair Setup.’ You’ll be asked to fill out a form with contact and shipping information, as well as provide a brief description of the issue you’re having.
Once you’ve completed the form, you should receive an email from Nintendo within 24 hours with further instructions along with a shipping label that will be used to send in your controller(s).
Keep in mind; if Nintendo is unable to repair your Joy-Con, they may replace it with a new one in a different color (Gray, Neon Blue, or Neon Red).
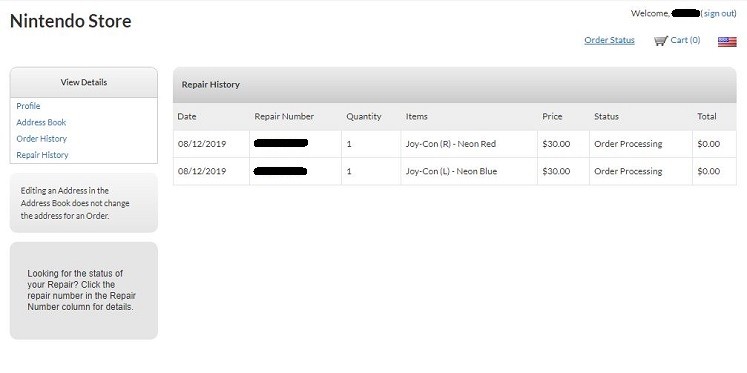
Once you ship your Joy-Con and Nintendo receives it, you’ll be able to check the status of your repairment by visiting store.nintendo.com. After logging into your account, select your name on the top right-hand corner to pull up your account page.
Next, look under the section labeled ‘View Details’ and select ‘Repair History’. Here, you’ll be able to see the status for each repair you’ve setup.
Nintendo states that repairs can take up to two weeks to be completed once your Joy-Con is received, which doesn’t take into account shipping time. This means you’re looking at a minimum of one month before your Joy-Con is back in your possession.
Because of this, we’ve provided some additional solutions for those who don’t want to wait that long and don’t mind getting their hands dirty.
Solution 3: Clean Your Joystick with Contact Cleaner
What you’ll need:
- Your Switch
- Electrical contact cleaner
- A pair of tweezers
This solution should alleviate your Joy-Con’s drifting issue, at least temporarily. The best part is it doesn’t even involve opening up the controller. First, you’ll want to purchase some electrical contact cleaner, which can be found online or at your local hardware store.
Note: We do not recommend using any random chemicals you may have laying around.
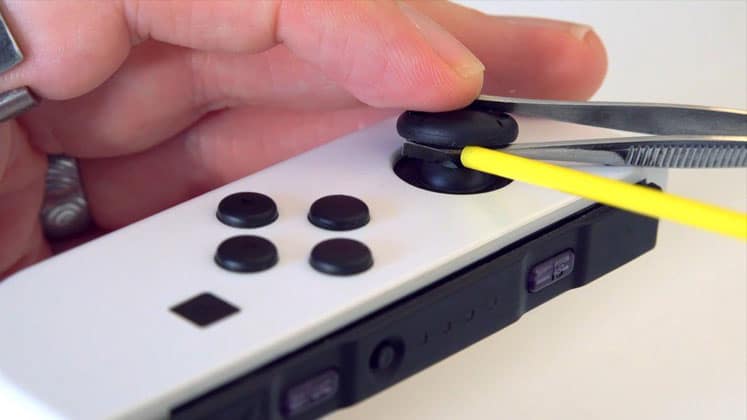
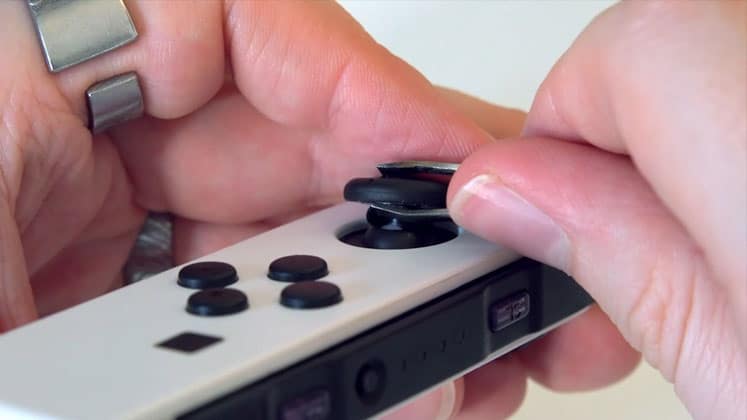
Detach the Joy-Con from the Switch tablet and hold it at an angle that allows you to see the base of the joystick. Using tweezers gently lift the rubber skirt covering the joystick. You should now be able to see the white-colored plastic of the internal mechanism.
You’ll only need to use one or two drops of electrical contact cleaner to remove any built-up residue or debris. Once you’ve applied the cleaner, spend about a minute moving the joystick in every direction to ensure the cleaner gets evenly distributed. Note: Avoid pressing any buttons during this time.
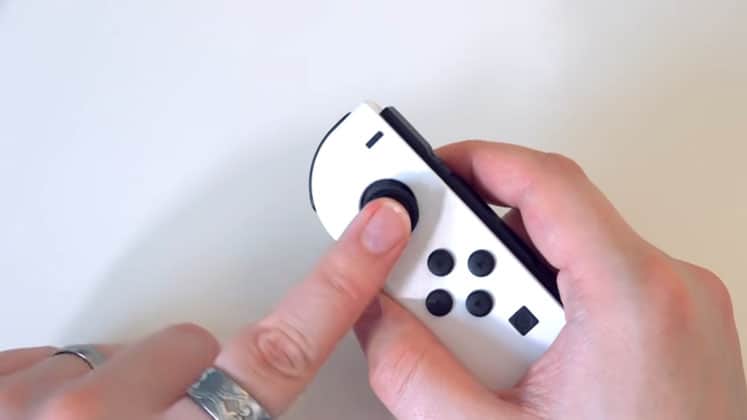
Once you’re done, leave the controller in a well-ventilated area to dry for a few hours. Hopefully, this fixes the situation at least for a little while. If you’re still experiencing issues, move on to Solution 4.
Solution 4: Replace Your Joystick
What you’ll need:
- Replacement analog stick purchased online
- Small Phillips screwdriver
- Small Tri-wing screwdriver
- A plastic shiv of some sort
- A pair of tweezers
You’ve exhausted all your other options and are still determined to fix the issue without outside help. We commend you!
For this Solution, you’ll need to purchase a replacement joystick online from eBay, Amazon, or someplace else. If you don’t already have the additional tools needed for this Solution, we recommend purchasing this repair toolset, which includes an extra joystick and all the necessary components.
Once you’ve set yourself up in a well-lit, clean work area, you’re ready to begin.
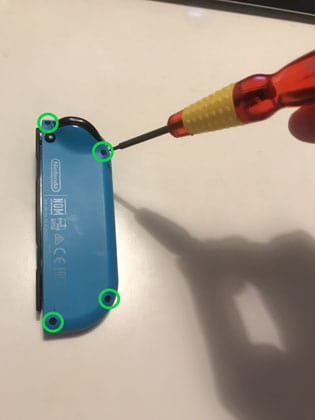
Use the Tri-wing screwdriver to carefully remove the four black screws on the back side of your Joy-Con. Once the screws have been removed, slide the plastic shiv down the seam that connects the front and back halves of the Joy-Con’s case in order to separate them.
Note: Take your time and make sure to not use too much force when pulling apart the two halves.

Once you’ve exposed the Joy-Con’s internal components, slide the shiv underneath the Joy-Con’s battery and gently remove it from its housing, making sure not to penetrate the battery or detach any wires.
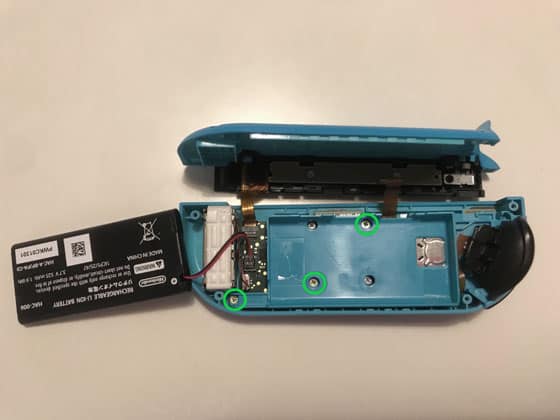
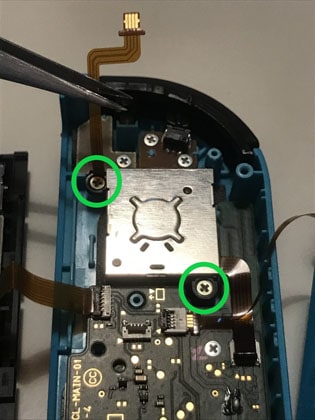
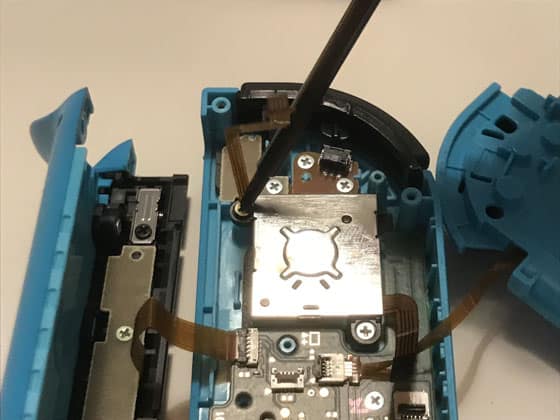
You’ll notice there are five screws keeping the battery housing secure, you’ll only need to remove the three (pictured above). Using your Phillips screwdriver, remove the three screws and gently lift the battery housing to reveal the components below, making sure not to detach the connecting ribbon.
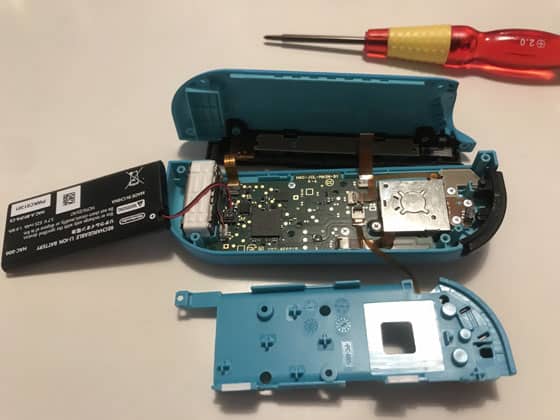
You’ll now be able to see the back of the analog stick, which looks like a big silver square. There’s a ribbon connecting it to the circuit board that you’ll have to very gently detach using your tweezers.
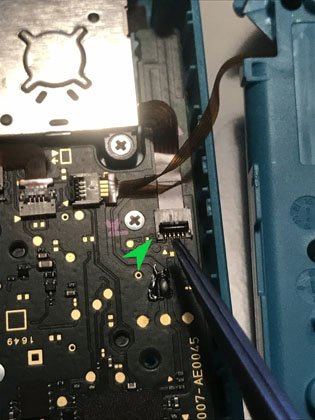
Lift the black clasp from the bottom. It should pop-up easily, allowing you to use the tweezers to carefully pull the ribbon out.

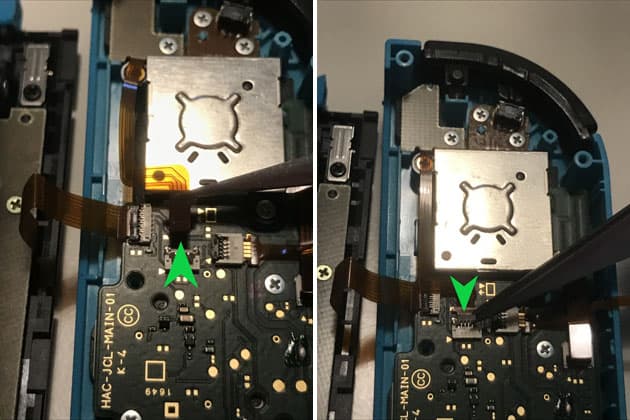
You’ll now notice there are two screws on opposite corners holding the stick in place which must be removed. In order to remove the top one, you’ll have to first disconnect the ribbon that’s covering it.
The process is similar to the previous ribbon removal, except the clasp is colored gray and must be removed from the top rather than the bottom.
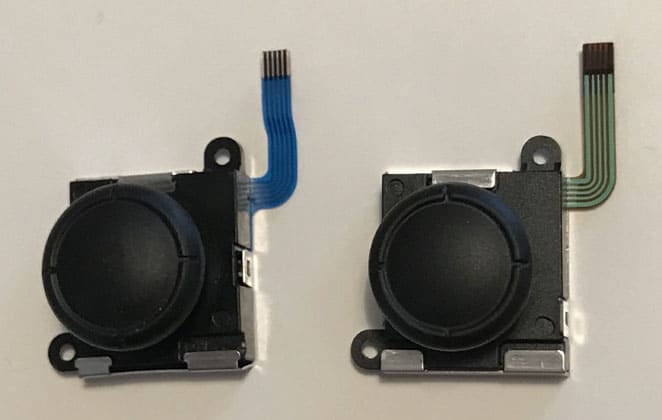
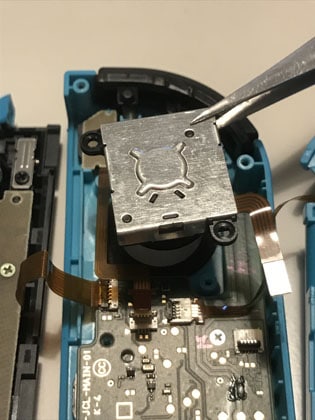
You’ll now be able to access the two screws holding the joystick in place. Remove them and proceed to gently extracting the joystick itself.
Now that that’s done, it’s time to install your replacement. Put the replacement stick in its place and screw it in.
Next, reconnect the two ribbons, making sure to carefully manipulate them and apply light pressure in order to ensure they’re fully connected. Once they’re back in place, gently press the clamps down to secure them.

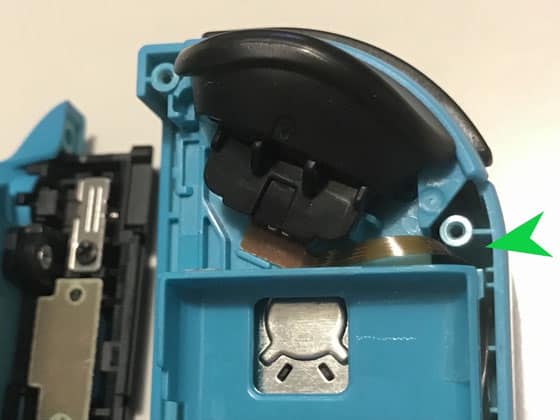
Place the battery housing back inside, making sure not to crush the ribbon connecting to the ‘ZL’ trigger.
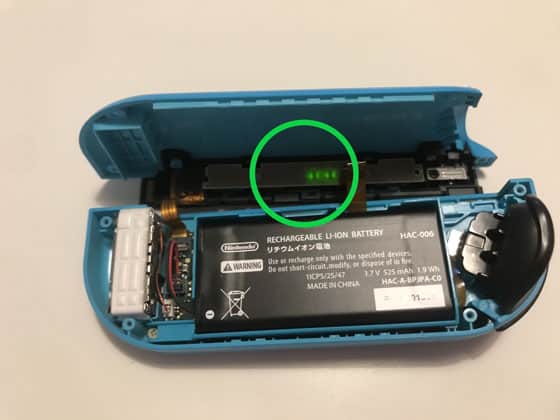
Next, put the battery pack back inside its housing, making sure to press down gently to secure it. Test all the buttons by pressing down on them, which should trigger the lights on the rail to cycle (except when clicking the stick).
Lastly, carefully line-up the front and back halves of the casing before screwing in the four Tri-wing screws.
Congratulations! You’ve just replaced your Joy-Con’s analog stick. Now you can get back to playing games on your Switch.