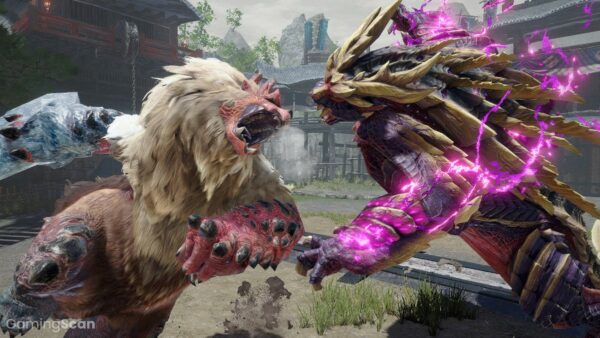
The Monster Hunter games have been known to punish players for showing up unprepared to fight the hardest monsters.
Much like the Dark Souls series and other challenging action RPGs, you’re rewarded for planning out your attacks and learning enemy tells, weaknesses, openings.
In this list, we’ll be ranking the hardest monsters in Monster Hunter World you’ll encounter throughout the story.
If we forgot to include your favorite monster or you disagree with our ranking, feel free to sound off in the comments and let us know.
Table of ContentsShow
Anjanath
Signature trait: Chasing you down
Many players consider Anjanath to be the first ‘wall’ in the story, mainly because up until the point you encounter one, you haven’t fought anything nearly as dangerous. Resembling a T-rex, Anjanath is a relentless predator that will use its mouth for breathing fire and chomping at your fleshy body.
No matter how much you run, Anjanath will always chase you down. This can make it terrifying for new players who, up until this point, have only had to deal with Kulu Ya Ku and Pukei-Pukei. With that said, Anjanath’s brutish and aggressive nature is also its downfall, often exposing its weak points.
Azure Rathalos
Signature trait: Never landing
Azure Rathalos is essentially a reskin of your standard Rathalos but with a few new behaviors that make it harder to bring down. For one, this monster is aggressive right out the gate, no build-up, just angry at you for being near it.
Secondly, it will stay in the air for the majority of the fight, firing the occasional fireball down at you from the heavens. Battling Azure Rathalos is a lot more feasible with flash pods, but even then, it can prove challenging for less experienced hunters.
Lavasioth
Signature trait: Impenetrable lava armor
Lavasioth is easily one of the most annoying monsters in the game and only gets worse as you rise in difficulty, especially with its Tempered variant. While it’s basically a reskin of Jyuratodus, the switch from Water to Fire along with the lava cave setting of the fight makes for a more hellish ordeal.
Before you can deal any real damage, you first have to get Lavasioth’s armor to break off, revealing its vulnerable skin. The whole time it’s shooting fireballs at you and dashing across the battlefield too. If you don’t act fast enough, the lava on its body will start to harden, creating a new layer of armor.
Uragaan
Signature trait: Terrifying jaw slam
Found in Elder’s Recess, Uragaan is the more powerful relative of Radobaan. What it lacks in spiky bones, it makes up for with jagged explosive shards that get left behind as it rolls around the battlefield, usually in your direction.
It’s also prone to emitting jets of vapor out of its body, which can cause you to burn or be put to sleep. Either way, you definitely don’t want to be too close when Uragaan slams its jaw since this attack deals massive amounts of damage or leave you staggered.
Teostra
Signature trait: Red flames of death
While he may not be as intimidating as his female love interest, Lunastra, Teostra is no slouch when it comes to carting hunters and will make quick work of inexperienced players. He’s prone to sending bursts of flames your way and can trigger massive supernova explosions.
Most of the challenge of taking this guy down stems from its speed and ferocity. With some practice, you’ll eventually figure out how to get around Teostra’s attack patterns. Even then, we recommend investing in defense and bringing plenty of potions.
Bazelgeuse
Signature trait: Explosive dive-bombs
Whether it’s interrupting an encounter or battling you directly, Bazelgeuse loves to appear out of nowhere like a bat out of hell whose sole purpose is to ruin your day. As one of the more versatile apex predators in the game, it possesses some of the most annoying attacks.
In the air, it can drop shards on the ground that can detonate to trigger huge explosions or dive-bomb headfirst into the player. On the ground, it can detonate even more shards with its tail and even shoot fireballs. And since it’s prone to Turf Wars, you can bet on any Bazelgeuse encounter to go wrong.
Black Diablos
Signature trait: Tunnel vision
If you thought battling a Diablos was hard, let us introduce you to its temperamental mating partner, Black Diablos. What makes this version so terrifying is that it never seems to let up regardless of how many attacks you dodge or damage you dish out.
While it may feature many of the same attack patterns as a normal Diablos, every action has a unique quirk with Black Diablos, netting her more range and making attacks feel unpredictable. Many players even admit to having a tougher time against Black Diablos than any of the Elder Dragons.
Xeno’jiva
Signature trait: Going nuclear
While it may not be the most complex battle in the game, bringing down Xeno’jiva can prove tricky simply because of how long the fight drags on due to its substantial health pool. There are two phases to this fight, with the latter being the more difficult portion.
During the second phase, Xeno’jiva will start to charge up its body and turn red before growing more aggressive and triggering explosions across the arena floor. Many of these attacks are capable of one-shotting you, making it one of the most challenging encounters in the game.
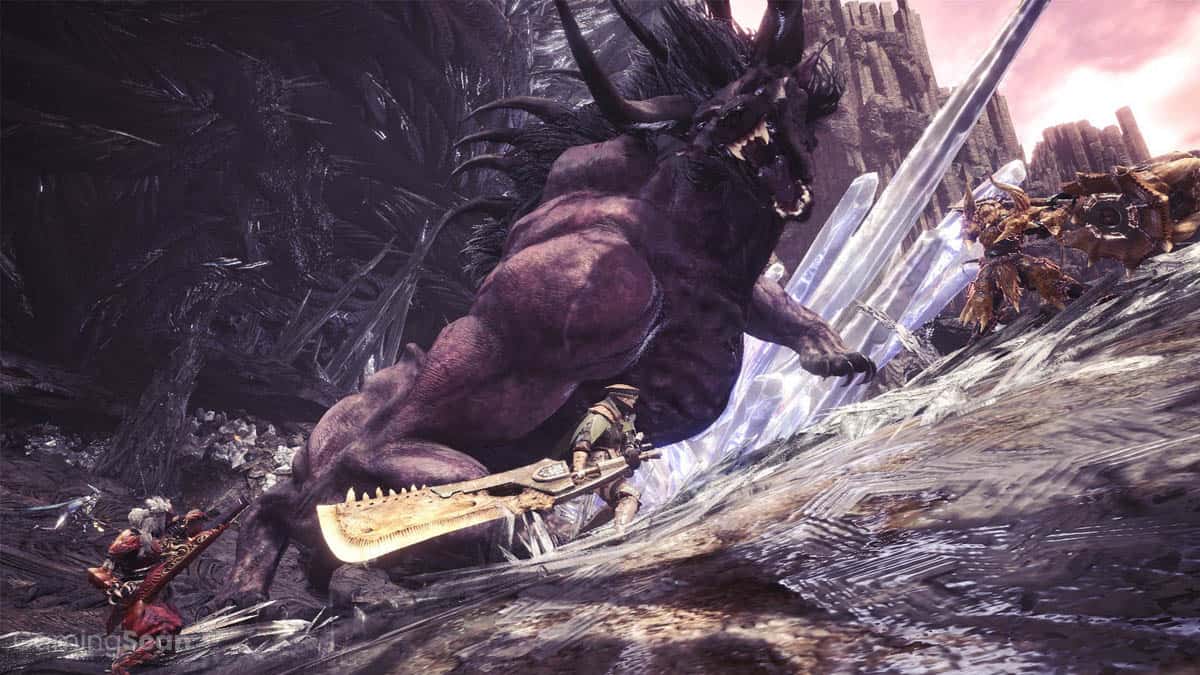
Deviljho
Signature trait: Pickled dragon breath
Despite being a standard monster, Deviljho is as powerful as an Elder Dragon and possesses a versatile moveset capable of rivaling many monsters on this list. Let’s go over the highlights: massive health, tremendously high physical damage, always angry.
So far, we have the making for the kind of monster you don’t want to randomly run into in a dark alley. What’s even crazier is that Deviljho will become more aggressive the longer the fight goes on, no doubt testing your patience and will to live in the process.
Nergigante
Signature trait: Spiky dive-bombs
Nergigante is one of the few ‘walls’ players will encounter during Monster Hunter: World’s story, and for a good reason, considering this guy eats other Elder Dragons for fun. And since you’ll likely be alone the first time you battle it, there’s a good chance you won’t survive the first, second, or even tenth attempt.
The real pain in Nergigante’s design comes from its signature dive-bomb, where it goes up and lunges at you from across the battlefield. In most situations, you’re left with nowhere to hide and must somehow manage to dodge the initial attack as well as secondary damage from nearby debris.
Kushala Daora
Signature trait: Endless tornadoes
Battling Kushala Daora wouldn’t be so bad if not for the never-ending barrage of tornadoes that get sent your way throughout the fight. It ends up feeling like a sadistic attempt on the developers’ part to make your hunter look as clumsy as possible.
While none of its attacks deal massive damage, the real obstacle is getting close enough to put in work before Kushala either takes off or blows you away with another tornado. Flash pods are an absolute must for bringing it down without subjecting yourself to a headache.
Kirin
Signature trait: Lightning strikes
Technically an Elder Dragon, on its surface, Kirin doesn’t give off any ‘scary video game boss’ vibes. However, try to engage with it, and you’ll learn exactly what makes it so terrifying to fight. It can shroud itself in electricity to toughen its skin and only has a single weak-spot, the horn on its head.
Combine this with the fact that it’s constantly moving around the battlefield and can trigger lightning storms nearby, and you have one of the hardest monster battles in the game. Your best bet is to try and stagger it, but even that puts you at risk of getting struck by its lightning.
Lunastra
Signature trait: Blue flames of death
Introduced to us as Teostra’s romantic partner-in-crime, Lunastra is a fire-breathing Elder Dragon whose power surpasses that of her male counterpart in every category. She emits blue flames that will drain your health quicker than you can heal once they make contact.
She’s also more prone to triggering massive ‘supernova’ explosions, forcing you to keep a safe distance for most of the fight. And if all that wasn’t bad enough, should you try to use a flash pod on Lunastra, it will trigger her to go supernova immediately.
Kulve Taroth
Signature trait: The floor is lava
Kulve Taroth is not just one of the largest Elder Dragons in Monster Hunter’s lore but also one of the few raid bosses to appear throughout the series’ history. It also has the largest health pool in the game, meaning you’ll need multiple groups of hunters going at it consistently to make any progress before it retreats.
While the encounter starts out easy enough, things get a lot riskier by the time you get to the final phase. Once Kulve sheds its scales, it starts moving faster and attacking more frequently. Not to mention this phase takes place in a relatively small cave with teammates who are also running around desperately trying to survive as well.
Behemoth
Signature trait: The meteor shower to end all meteor showers
Introduced as a Final Fantasy crossover event boss, Behemoth is undoubtedly the most formidable monster to take down. There are a couple of reasons behind this, most notably the fact that doing so allows you to craft the most powerful armor set (stats-wise) in the game.
Additionally, since the fight is designed for coordinated teams, it’s practically impossible to win with randoms. Pretty much any encounter with Behemoth will take a turn for the worst at some point since his many attacks and phases are designed to trip you up.