Yae Miko is a 5* Electro Catalyst DPS that’s capable of dealing consistent off-field DMG through her Elemental Skill and massive nuke DMG through her Elemental Burst.
Since she doesn’t require as much on-field time as most DPS characters, Yae is a great secondary DPS. She works great with other characters who don’t mind sharing the spotlight—Raiden Shogun, Yomiya, and Childe come to mind first.
While her playstyle is fairly simple, equipping her with the right gear and teaming her up with the right teammates is essential to bring out her full potential, regardless of whether you’re a newbie or a veteran, a F2P player or a big-spender.
In this Yae Miko build guide, we’ll show you how to prioritize her talents to get the most out of her kit, how valuable her constellations are, which artifacts and weapons suit her the best, and, finally, which teammates you should pair her with. Once all that is done, you’ll have a firm understanding of whether or not Yae is worth it for you.
So without any further ado, let’s begin.
Table of ContentsShow
Yae Miko’s Talent Priority
| Talent | Description | Priority |
|---|---|---|
| Normal Attack (Spiritfox Sin-Eater) | Normal Attack Summons forth kitsune spirits, initiating a maximum of 3 attacks that deal Electro DMG. Charged Attack Consumes a certain amount of Stamina to deal Electro DMG after a short casting time. Plunging Attack Gathering the might of Electro, Yae Miko plunges towards the ground from mid-air, damaging all opponents in her path. Deals AoE Electro DMG upon impact with the ground. | Most of Yae’s DMG comes from her Skill and Burst, leaving her Normal Attack talent largely useless. Even in Taser teams, you’ll want to use a Hydro or an Anemo character as an on-field driver. With that in mind, this is easily Yae’s least important talent. |
| Elemental Skill (Yankan Evocation: Sesshou Sakura) | To Yae, such dull tasks as can be accomplished by driving spirits out need not be done personally. Moves swiftly, leaving a Sesshou Sakura behind. Sesshou Sakura Has the following properties: • Periodically strikes one nearby opponent with lightning, dealing Electro DMG • When there are other Sesshou Sakura nearby, their level will increase, boosting the DMG dealt by these lightning strikes. This skill has three charges. A maximum of 3 Sesshou Sakura can exist simultaneously. The initial level of each Sesshou Sakura is 1, and the initial highest level each sakura can reach is 3. If a new Sesshou Sakura is created too close to an existing one, the existing one will be destroyed. | The closer Yae’s Sesshou Sakuras are to one another, the harder they’ll hit. And given their short cooldown, it’s easy to maintain 100% uptime on them. That being said, for F2P players, Yae’s Elemental Skill constitutes a smaller part of her overall DMG than her Burst, making this her second priority skill. The more constellations you have, the better this ability becomes. So if you’ve got a couple of constellations lying around, bump this talent up to first priority. |
| Elemental Burst (Great Secret Art: Tenko Kenshin) | Legends of “kitsunetsuki,” or the manifestations of a kitsune’s might, are common in Inazuma’s folktales. One that particularly captures the imagination is that of the Sky Kitsune, said to cause lightning to fall down upon the foes of the Grand Narukami Shrine. Summons a lightning strike, dealing AoE Electro DMG. When she uses this skill, Yae Miko will unseal nearby Sesshou Sakura, destroying their outer forms and transforming them into Tenko Thunderbolts that descend from the skies, dealing AoE Electro DMG. Each Sesshou Sakura destroyed in this way will create one Tenko Thunderbolt. | Basically, Yae’s Burst calls down a lightning strike from the sky. Then, it calls down another—visually smaller—lightning strike for each Sesshou Sakura on the field, removing it from the field and restoring one Elemental Skill charge. Overall, this Elemental Burst does massive DMG, but what’s interesting is that the primary—visually larger—lightning does less DMG than the subsequent strikes. So make sure you’ve got all three Sesshou Sakuras on-field when casting this, otherwise, you’re losing more than 70% of the Burst overall DMG potential. In any case, this is F2P Yae’s most important talent. |
Yae Miko’s Passive Talents
| Talent Name | Description | Evaluation |
|---|---|---|
| Meditations of a Yako | Has a 25% chance to get 1 regional Character Talent Material (base material excluded) when crafting. The rarity is that of the base material. | This is essentially free resin, which is always great. It’s more unreliable than Eula’s and Xingqiu’s talent material utility passives, but it’s still valuable. |
| The Shrine’s Sacred Shade | When casting Great Secret Art: Tenko Kenshin, each Sesshou Sakura destroyed resets the cooldown for 1 charge of Yakan Evocation: Sesshou Sakura. | With this talent, you no longer have to choose between Yae’s consistent off-field DMG and amazing Burst DMG. You can deploy 3 Sesshou Sakuras, Burst the enemy, and then redeploy all 3 Sakuras again, all in the span of several seconds. |
| Enlightened Blessing | Every point of Elemental Mastery Yae Miko possesses will increase Sesshou Sakura DMG by 0.15%. | Don’t underestimate the usefulness of this talent. This essentially turns EM, which would otherwise be a less desirable substat, into some decent DMG. |
Yae Miko’s playstyle is relatively straightforward. You should deploy all 3 of her Sesshou Sakuras—ideally in a triangle so that they can buff each other up—switch to your buffing characters (if you have any), lay down their buffs, then switch back to Yae, nuke the enemy with her Burst, and redeploy all 3 charges of the Elemental Skill.
It’s important that you apply the buffs before casting her Burst since this is the part of her kit that deals the most DMG if you’re a F2P player. Additionally, we should note that Yae’s Sesshou Sakuras don’t snapshot—meaning they don’t operate under the assumption that Yae’s stats are always the same as they were at the moment of casting.
Fischl’s Oz and Xiangling’s Pyronado do this, so if you cast them within Bennett’s Burst, they’ll factor in that buff for their entire duration, even after Bennett’s buff disappears. Because Yae doesn’t get this benefit, you don’t need to worry about pre-buffing her Sakuras, which is convenient.
As mentioned, Yae’s constellations power up her Skill more than her Burst, so let’s look at how they do this.
Yae Miko’s Constellations
| Constellation Name | Description | Evaluation |
|---|---|---|
| Yankan Offering | Each time Great Secret Art: Tenko Kenshin activates a Tenko Thunderbolt, Yae Miko will restore 8 Elemental Energy for herself. | Yae’s Elemental Burst may be powerful, but it’s prohibitively expensive—sharing a spot for the most expensive Burst in the game with Raiden Shogun at 90 Energy. This constellation may not increase Yae’s DMG ceiling, but it significantly improves her rotations. And, in a way, casting her Burst more often does equate to significantly more DMG. |
| Fox’s Mooncall | Sesshou Sakura start at Level 2 when created, their max level is increased to 4, and their attack range is increased by 60%. | This is a significant buff to Yae’s Elemental Skill. It may not sound like much, but this is one of her best constellations overall. |
| The Seven Glamours | Increases the Level of Yakan Evocation: Sesshou Sakura by 3. Maximum upgrade level is 15. | Buffing up her Elemental Skill even more, constellations two and three considerably shift Yae’s overall DMG output in favor of her Skill. |
| Sakura Channeling | When Sesshou Sakura lightning hits opponents, the Electro DMG Bonus of all nearby party members is increased by 20% for 5s. | This is another significant DMG upgrade. What’s more, it buffs up the whole team, so in a party with multiple Electro characters, the value is multiplied. |
| Mischievous Teasing | Increases the Level of Great Secret Art: Tenko Kenshin by 3. Maximum upgrade level is 15. | At this point, Yae’s Skill DMG has already overtaken her Burst DMG. This won’t change that, but it will make the Burst more competitive. |
| Forbidden Art: Daisesshou | The Sesshou Sakura’s attacks will ignore 60% of the opponent’s DEF. | DEF shredding is arguably the most powerful buff in Genshin Impact. There’s a reason Raiden Shogun’s C2 is the best second constellation in the game—it’s basically a C6 power-level given out at C2. Yae Miko gets the same DMG upgrade to her Elemental Skill, although she gets it as her last constellation. |
There’s not a single constellation Yae Miko has that’s bad.
Her C1 isn’t a straight-up DMG upgrade, but it effectively makes her Burst cost 66 Energy instead of 90 Energy—a huge difference. As a quality of life upgrade, the value of this constellation cannot be overstated. Needless to say, no constellation can match the value of a brand new 5* character to an account. It’s better to have C0 Yae and another C0 5* character than a C1 Yae, especially if you’re a F2P player. But if constellations are on the table, this one is very good.
Her C2, C3, and C6 directly buff Sesshou Sakura DMG. With so many buffs, and all of them sizeable at that, it’s no wonder that the power dynamic of her abilities shifts after a couple of constellations get unlocked. C4 is a sizeable buff that the rest of the team can benefit from, and even C5 isn’t bad. So if you’re interested in collecting duplicates of Yae, there’s no constellation that you’ll feel bad about.
Best Weapons For Yae Miko
| Weapon Rarity | Explanation |
|---|---|
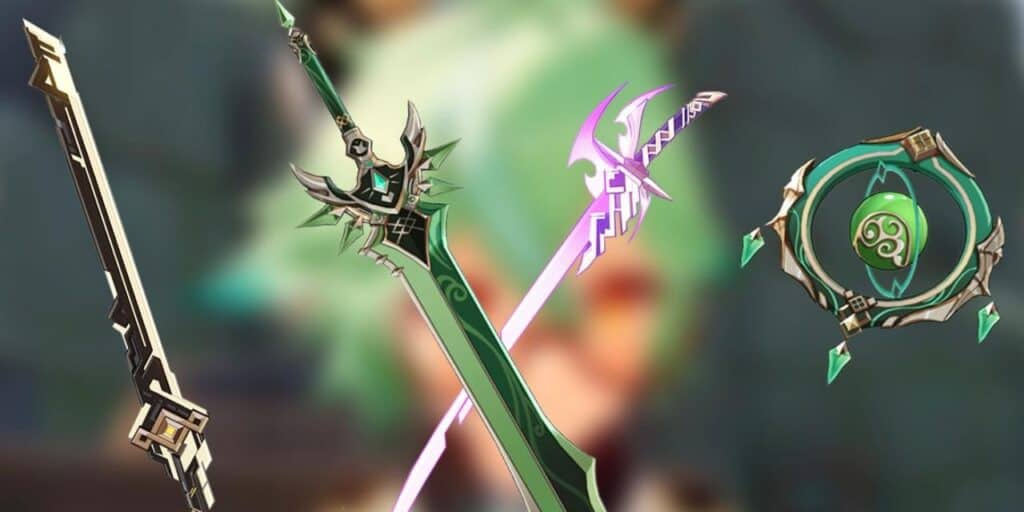
| Kagura’s Verity 5* | Kagura’s Verity has Yae’s kit written all over it. It is by far her BiS weapon. The base ATK is good, the CRIT DMG substat is great, but the most important thing is the passive, which buffs up both Electro DMG and—to a greater extent—Elemental Skill DMG. |
| Lost Prayer to the Sacred Wind 5* | No other 5* catalyst can even come close to Kagura’s Verity on Yae. Lost Prayer is the second-best option because of the CRIT Rate substat, but Yae effectively makes little to no use of its passive. If you have this weapon lying around, it’s not a bad fit, but honestly, we’d rather give her some of the 4* weapons listed below. |
| The Widsith 4* | The Widsith is one of those 5* in disguise weapons. It provides a fair bit of base ATK, offers only slightly less CRIT DMG than Kagura’s verity, and gives one of three exceedingly powerful buffs when Yae takes the field. Best of all, Yae can make great use of all 3 buffs. You have to be more mindful of your rotation when using this weapon, but at higher refinements, the Widsith can outdamage even C1 Kagura’s Verity during its passive uptime. |
| Oathsworn Eye 4* | Normally, we leave event-exclusive weapons as a footnote, but given that this weapon and Yae were released in the same patch, we’ve decided to highlight its importance. For F2P players, the Oathsworn Eye is an amazing stat stick. It may not look like much, but it gives a lot of base ATK for a 4* weapon, some ATK% scaling which benefits both Yae’s Skill and Burst, and the passive essentially functions like an Energy Recharge Sands. As mentioned, Yae’s Burst is prohibitively expensive for F2P players who have her at C0. This weapon helps address her Energy concerns splendidly. |
| Hakushin Ring 4* | In case you’re a F2P player who started playing after patch 2.5 and doesn’t have Oathsworn Eye, worry not—Yae has another decent F2P option in the craftable Hakushin Ring. This weapon has the same high base ATK as the Oathsworn Eye and it also provides Energy Recharge. Sadly, it provides less Energy Recharge than an r5 Oathsworn Eye, but even this amount still helps a lot. Furthermore, the passive can greatly buff up the Elemental DMG of all party members in a Taser team. |
Best Artifacts For Yae Miko – 4-Emblem of Severed Fate
Most 5* characters nowadays have both a 5* weapon and a 4-piece artifact set bonus that just seem tailor-made for them. Yae Miko is one of the exceptions, as despite having her own 5* weapon, there is no 4-piece set bonus in the game that complements her kit.
For this reason, many players choose to run her by mixing any of these 2-piece set bonuses: Gladiator’s Finale, Thundering Fury, Shimenawa’s Reminiscence. These are solid options that improve her overall DMG, we have nothing against them. If you’re rocking a couple of constellations, then this is hands-down the best choice.
However, a C0 Yae Miko is characterized by two things—her incredible Burst and its incredible Energy Cost. The 4-piece Emblem of Severed Fate set bonus not only increases her Burst DMG but also makes it easier for her to cast her Burst. That’s why we consider this to be the best artifact set for C0 Yae.
In terms of artifact main stats, you want either ATK% or Energy Recharge on the Sands, Electro DMG on the Goblet, and CRIT Rate/CRIT DMG on the Logos. Aim for a 1:2 ratio of CRIT Rate and CRIT DMG.
As far as the Sands are concerned, here’s the deal: ATK% will greatly increase Yae’s DMG, but if you can’t cast her Burst consistently, it’s better to trade that DMG off for consistency by opting for an ER Sands.
In terms of substats, Yae wants CRIT Rate, CRIT DMG, Energy Recharge, and ATK%. Elemental Mastery is also decent, but do keep in mind that this will only buff her Skill and not her Burst.
In addition to this, we have to mention the 4-piece Thundersoother set bonus, which gives the biggest overall DMG buff to Yae’s entire kit. The problem with this set bonus is that it only works when the enemy is affected by Electro. Some enemies cannot be affected by Electro. And most Elemental Reactions will make the enemy no longer affected by Electro when they trigger. So while the ceiling for this set bonus is the highest, it’s also the least reliable, which is why we don’t recommend it.
Best Team Composition For Yae

F2P Taser Yae
- Yae Miko
- Fischl
- Xingqiu
- Sucrose
Fischl shares a lot of similarities with Yae, as they both offer consistent off-field Electro DPS. The reason she’s here isn’t because Yae can’t provide enough Electro off-field DMG on her own. Instead, Fischl is here to battery Yae and make sure she can get to cast her 90 Energy Burst as frequently as possible. What’s more, as the second Electro character in the team, she unlocks the Electro Resonance, which also helps with overcoming Energy issues. So, if you don’t have Fischl, the best replacement would be Electro Traveler, who can also pump loads of Energy into Yae and keep the Electro Resonance going.
Xingqiu is here for his off-field Hydro application. The goal of this team is to trigger as many Electro-Charged Reactions as possible, and you can’t do that without keeping enemies affected with Hydro. Xingqiu is the best candidate for this job. Unfortunately, the best replacements for Xingqiu are Childe and Kokomi—both limited 5* characters that we would by no means categorize as F2P. Barbara can do the job, but at that point, it’s better to just forget about Electro-Charged altogether and focus on raw Electro DMG by slotting in Beidou or Razor.
Sucrose is the best on-field attacker for Taser teams. This is because all her Normal Attacks do Anemo DMG and therefore trigger loads of Swirl Reactions. Best of all, since enemies can be affected with both Electro and Hydro at the same time, Sucrose can Swirl both Elements for double the Reaction DMG. Slap on a 4-piece Virisecent Venerer and watch as the enemies melt with their Electro and Hydro Resistances shredded. Best of all, Sucrose provides loads of Elemental Mastery for the team. Elemental Mastery is valuable for Electro-Charged, but it also directly buffs Yae’s Elemental Skill DMG.
While no one can replicate Sucrose’s role in this team—not even 5* characters—any Anemo character can do the main job which is to use the Viridescent Venerer set bonus. So Anemo Traveler and Sayu are both solid options, as are all other less F2P-friendly Anemo characters.
For Whales
- Yae Miko
- Raiden Shogun
- C6 Kujou Sara
- Kazuha
Raiden Shogun is the main DMG dealer in this team—especially if you’ve got her C2, which even many F2P players are gunning for. However, she synergizes exceptionally well with Yae. Raiden replenishes Yae’s Energy and makes her Burst hit harder. Miko helps power up Raiden’s Burst through her incredibly high-costed Burst. And since neither of these characters is a hypercarry in the sense that they need to be on-field at all times, they can share the DPS role without any issues.
Kujou Sara is there to provide ATK buffs and CRIT DMG buffs to both Yae and Raiden. She can only buff one of them at a time, but with the C2, she should have no problem throwing down these buffs just before Yae or Raiden take the field to use their Bursts. Also, her own Burst is highly costed and deals a lot of DMG, which once again synergizes well with Raiden. We should say that, unless you’ve got her C6, you’ll probably get more use out of Bennett.
Kazuha is here to buff up the team’s Electro DMG and to shred enemies’ Electro Resistance. What’s great about Kazuha’s buffs is that none of them overlap with Sara’s (or Bennett’s) buffs. This means you won’t encounter any diminishing returns for running both of them.
Is Yae Miko Worth It?
The developers working on Genshin Impact are getting better and better at designing solid characters that feel powerful but don’t break the game or introduce power creep.
Yae is a great example of this. She’s a powerful unit who brings value to any team she’s in. At the same time, she doesn’t push the envelope on the overall character power level. In that sense, we feel she strikes the perfect balance of power and sustainability for this game.
At the same time, this also means that she isn’t a must-have. If you like her design, her kit, or her character, you can try to get her resting assured that your resources won’t be wasted. In this sense, she is worth it. She may not be an S-Tier character, but we have no qualms putting her in the A-Tier on our Character Tier List.
At the same time, if you don’t like her design, kit, or character, you can just skip her. She’s a solid character, but the game has no shortage of solid characters. In other words, while she is definitely worth it if you like her, she’s not so incredibly busted that you should feel compelled to get her or risk feeling underpowered for endgame content.